
7 Steps for Teaching Right-Brained Learners to Read Sight Words
If your right-brained child is learning the sounds that letters represent, why not jump right in and teach the sounds from within whole sight words? Since they are big-picture thinkers, right-brained learners are most successful when you start at what we'd typically consider to be the end and move toward the beginning: when they see the relevance of what they are learning and understand that words communicate meaning. Visuals and body movement also help them make connections, vital to understanding and remembering what the words mean. Rather than using more words to explain, let’s just do an exercise and see what happens.
1. Display the following SnapWords® cards in a pocket chart.
Talk about the images with your child(ren) just as you would talk about the illustrations in a picture book, noticing details in the images:


2. The next time you go through the 12 words,
let the child find a word to identify. You might just ask, “Can you point to a word you know?” If the child hesitates on a word, immediately tell him the word so he won’t say the wrong one and get that stuck in his head. Keep it light, rather than making it feel like a formal lesson.
3. You can check whether your child knows all the words
on sight by playing a little game. Say, “Can you find ______” and see if she locates the correct word. Or you could just have her point and read her way through the displayed words.
4. Rearrange the words in the pocket chart
like this, adding pictures of home, a dog, and cat where needed:

5. Have the child read these little sentences
and even rearrange the words and picture cards to make his own sentences.
6. Then ask the child
which card she thinks she’s ready to turn over to the plain side so that the picture no longer shows. If the words are still arranged in sentences, this will mean that part of the sentence is stylized but here and there a word will be turned over to reveal the plain side. Gradually, one at a time, the words will be turned over so that she is reading only plain words!
7. Now is the time to play mini-phonics games.
For instance, ask: “Which words start with the sound [short] a?” (AND, AT). “Which start with sound of N?" Don’t say letter name, only say the sound N makes. (NO, NOT). "Which two words start with sound of short I?" (IN, IS). "Find two words that are almost the same but are backwards of each other." (ON, NO). "Find two words that both end in the sound of T." (AT, NOT). "Find a word that ends just like NO." (GO). Later groups of words use more advanced sound spellings. (Refer to The Illustrated Book of Sounds & Their Spelling Patterns as a guide for the various sound spellings the child will need to identify from within sight words).


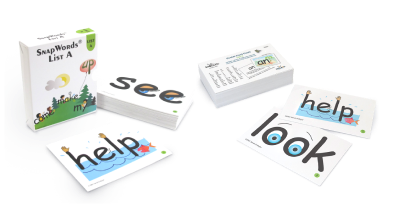
Get your own 306 SnapWords® Teaching Cards!
And watch your child’s reading level & fluency jump, comprehension improve, and use their learning strengths to tackle reading.
Buy 306 SnapWords® Teaching Cards